
On this page, you will find information about connecting to eduroam.

Wizard configuration (current version July 2024)
Browse to CSIM page on entreprise-wifi.net and download the installer that corresponds to your operating system.
When asked for a username, enter your CSIM username (your username must have @cs.ait.ac.th at the end) and CSIM password. If you don't use @cs.ait.ac.th, the connection will not be authenticated.
You can also use the QR-code for quick access.
There is no automated installer for Android, so you will have to configure eduroam network manually.
Note: the installer is bound to change regularly. Always download and install the new version when available or your connection will stop working. (our server for eduroam authentication is using Let's Encrypt certificates that are renewed every 3 months; furthermore, the root Certificate Authority used by Let's Encrypt may also be changing, the configuration must then change to reflect the changes of the root CA).
Manual configuration
The configuration for Windows 7, Ubuntu, Android and Mac OS X are described further.
Configuring eduroam for Microsoft Windows 10
The configuration for Windows 10 has changed enough it is worth its own description.
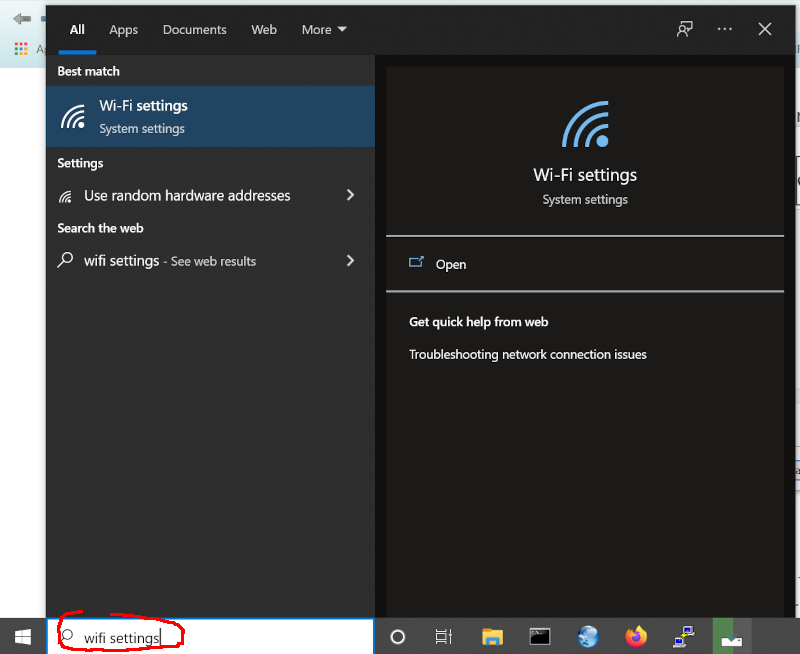
| 1. | Windows 10 does not offer a simple way to modify a configuration beyond the initial setting, so you should first make sure you delete any existing eduroam setting.Open the WiFi settings by typing wifi settings in the search box. |
 |
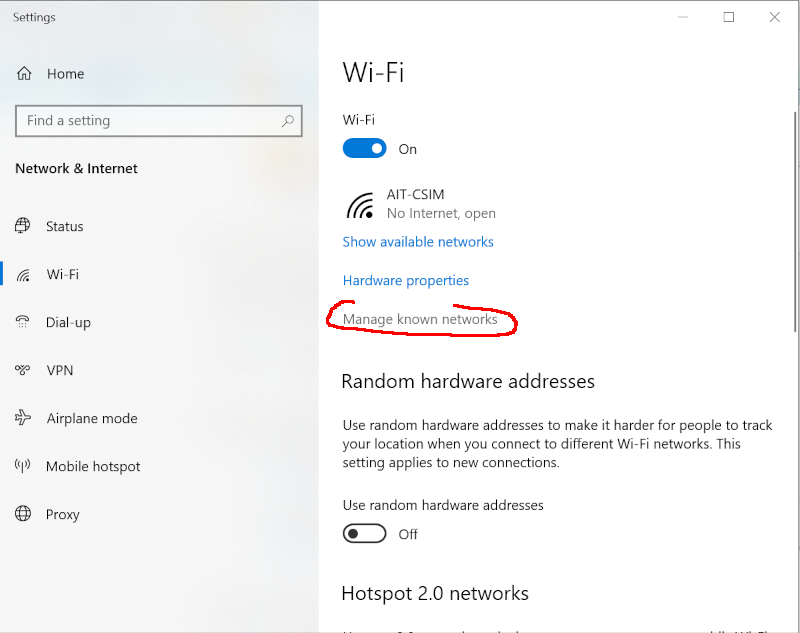
| 2. | On the WiFi page, click on Manage known networks. |
 |
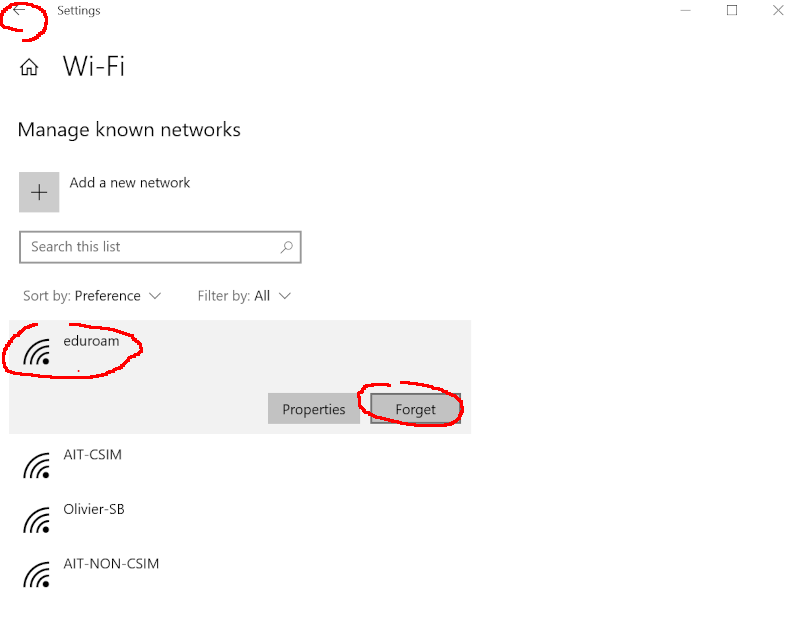
| 3. | Click on eduroam and select Forget. Go back to the previous page. |
 |
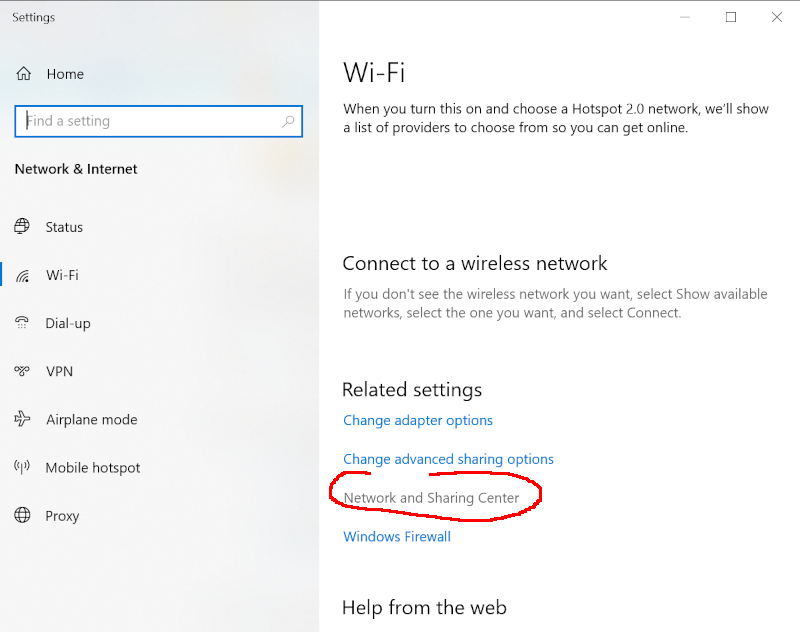
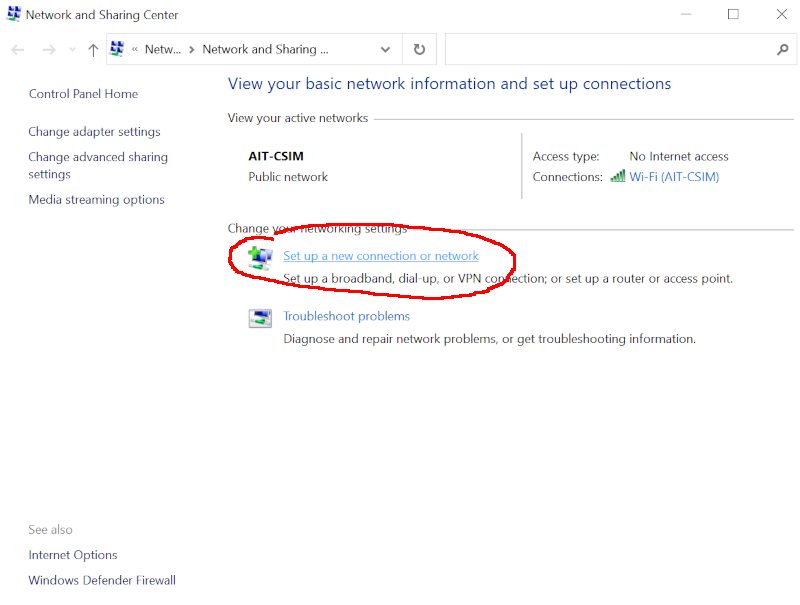
| 4. | Scroll down to Network and Sharing Center. |
 |
| 5. | Click on Setup a new connection or network. |
 |
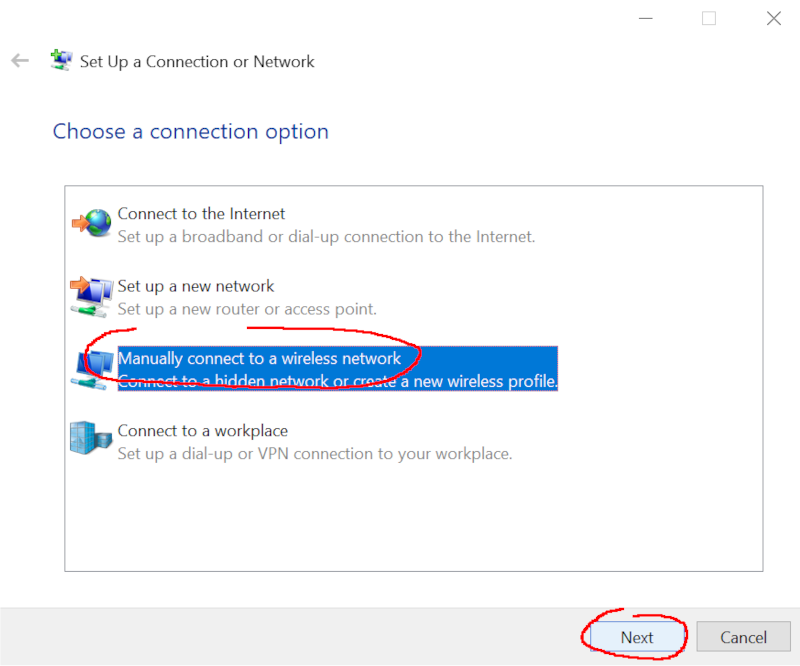
| 6. | Select Manually connect to a wireless network and click OK. |
 |
| 7. | Enter the network name eduroam (lower case only).Select the Security type WAP2-Enterprise.You can also choose to start eduroam automatically every time the network is in range.Click Next. |
 |
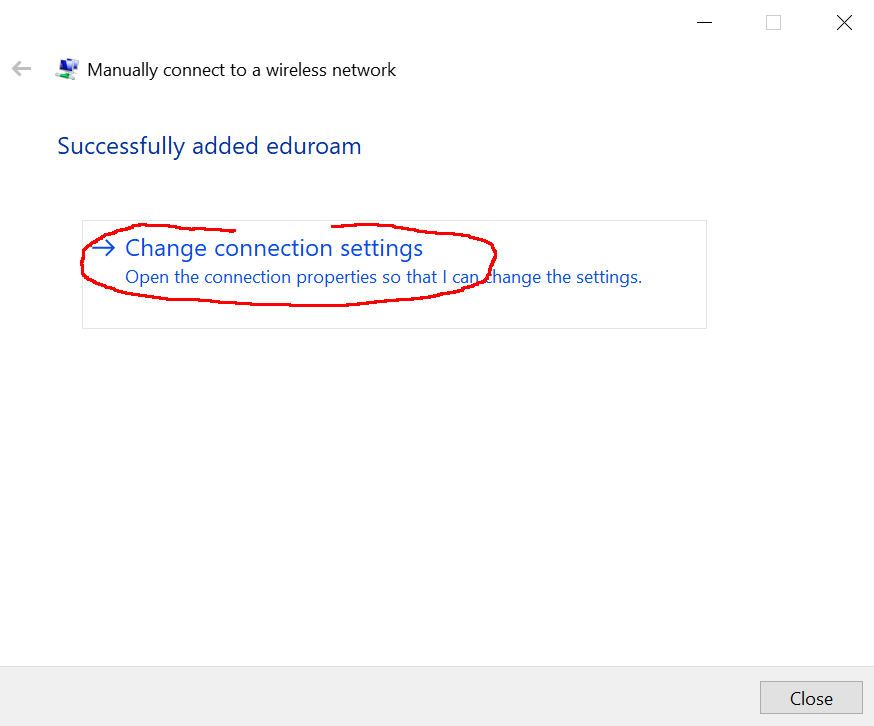
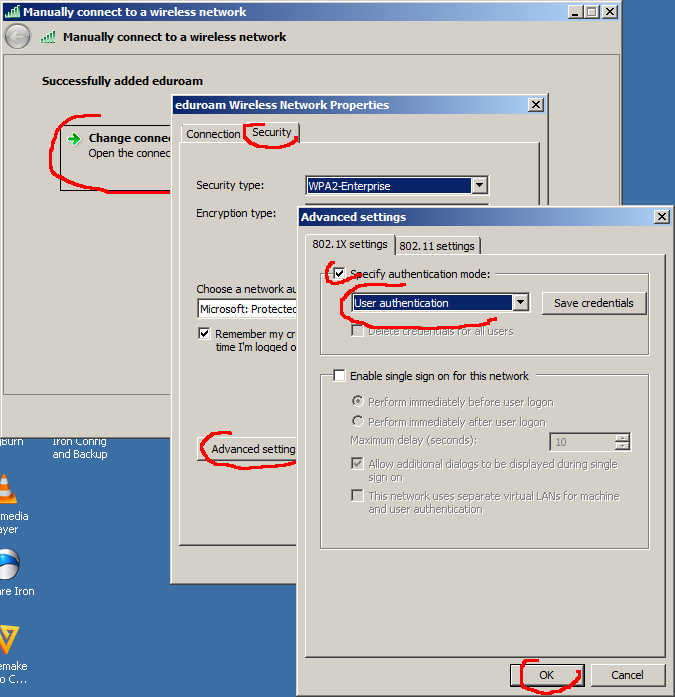
| 8. | Click on Change connection settings. |
 |
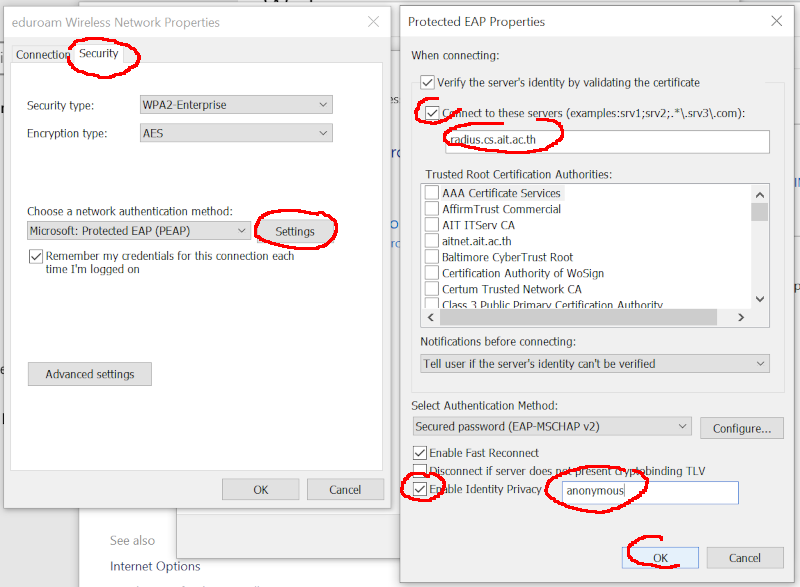
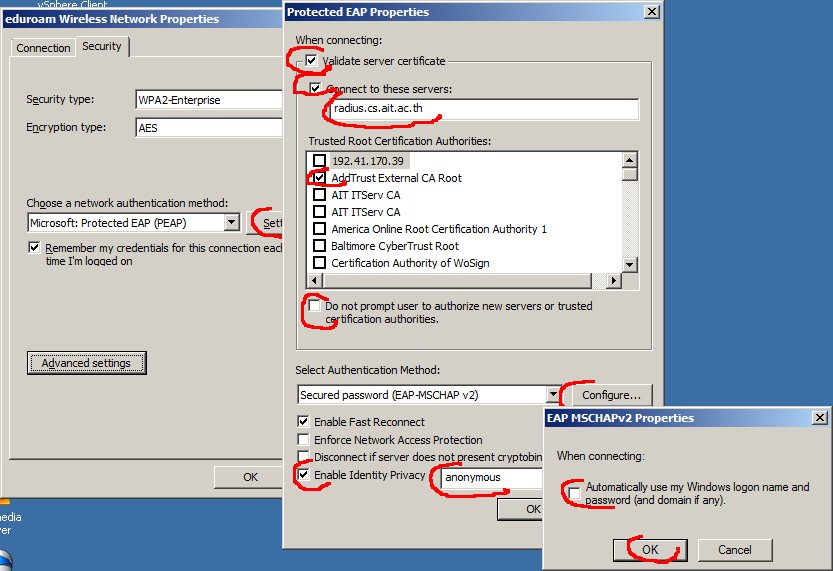
| 9. | In the tab Security, select Settings.Check the box Connect to these servers.Enter the server name radius.cs.ait.ac.th.Check the box Enable Identity Privacy.Enter the name anonymous.Click OK. |
 |
| 10. | Select Advanced.Check the box Specify authentication mode.Select User authentication.Click OK or Close to finish close any remaining menu. |
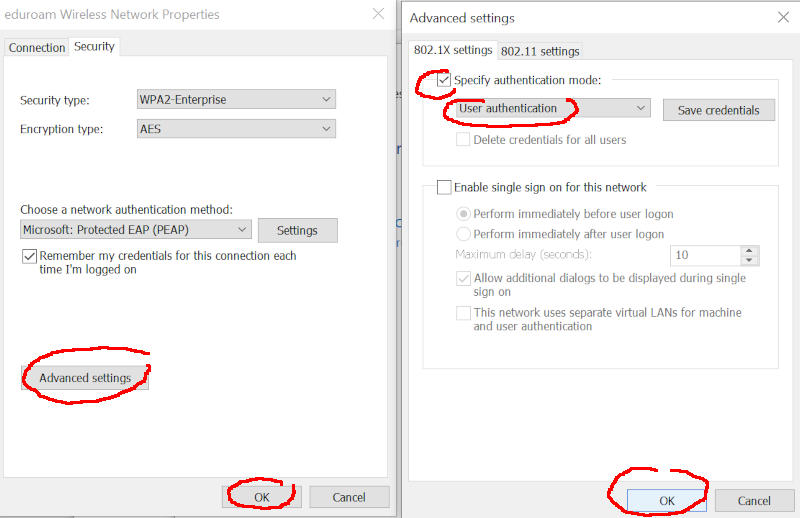 |
| 11. | The first time you connect to eduroam, you must enter your credential.Use your CSIM username, followed by @cs.ait.ac.th.Use your CSIM password. Note: you must make really sure to use @cs.ait.ac.th or the connection will not work. Once set, you should not need to redo the configuration for eduroam. As long as you have an account with CSIM, you will be able to use the connection. |
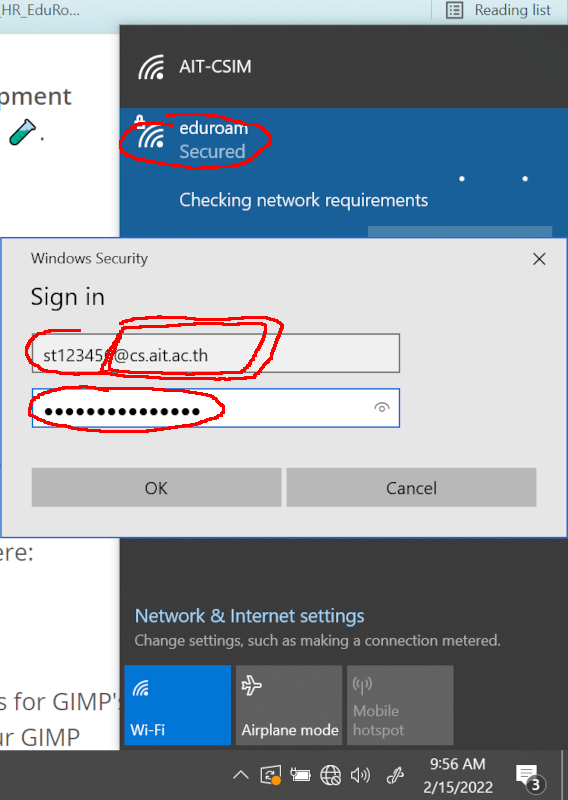 |
Configuring eduroam for Microsoft Windows 7
The solution below has been tested with Windows 7. The graphical interface may vary but the procedure is the same.
| 1. | Open the Network and Sharing Center in the Control Panel and click on Manage wireless networks. | 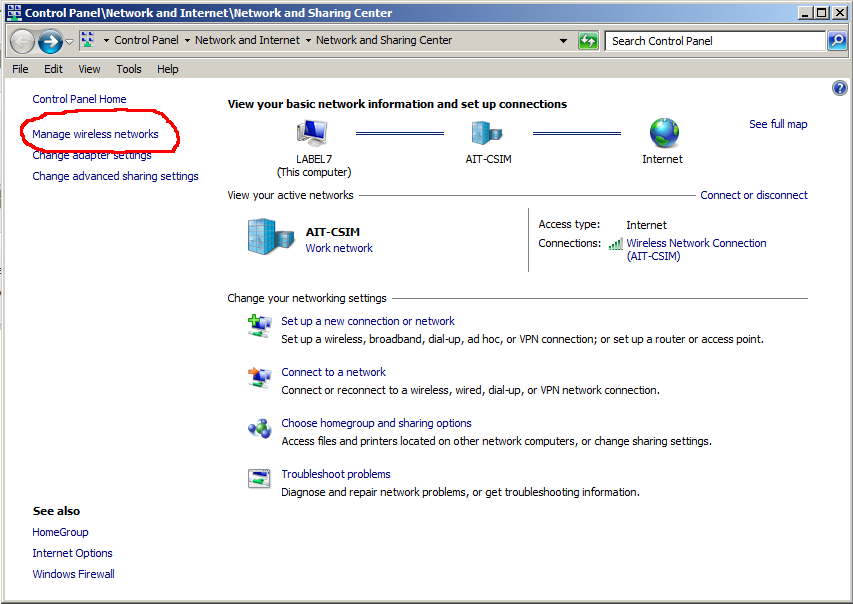 |
| 2. | Click Add to create a new network.
Choose Manually create a network profile. In the Network name, enter |
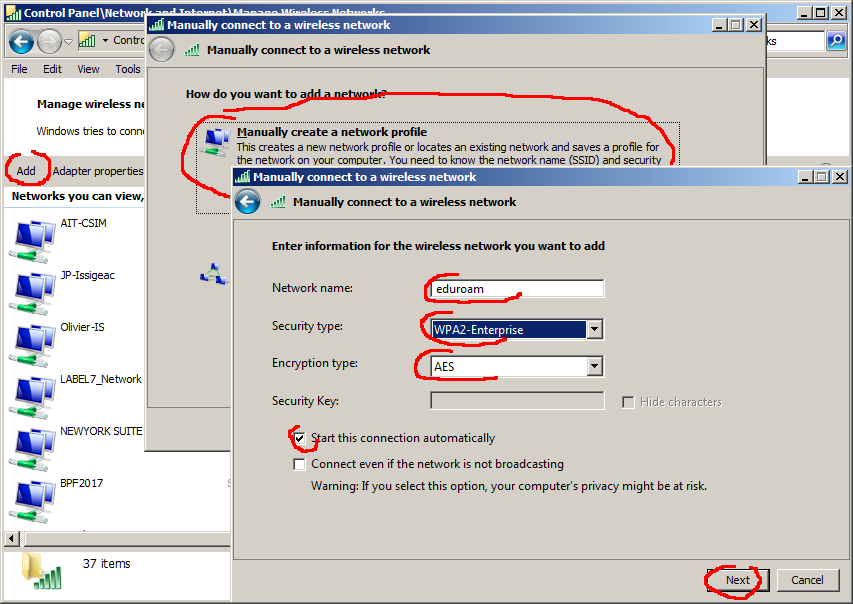 |
| 3. | Once the window Successfully added eduroam is up, click on Change connection settings.
In the tab Security, click on Advanced settings. Check the box Specify authentication mode. |
 |
| 4. | Click on Settings
Make sure that the box Validate server certificate is checked. Uncheck the box Automatically use my Windows logon name and password (and domain if any). Close all the windows that were open during the configuration of |
 |
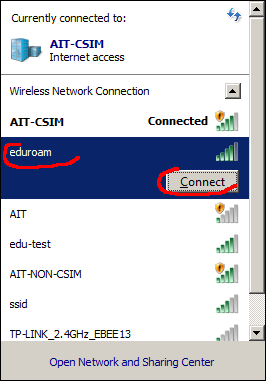
| 5. | Select the WiFi network eduroam and click Connect. |
 |
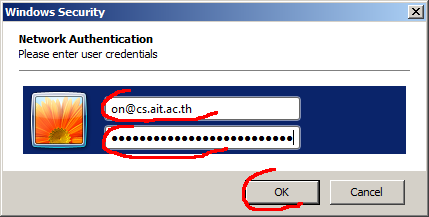
| 6. | Enter your CSIM username (your username must have @cs.ait.ac.th at the end) and CSIM password. If you don't use @cs.ait.ac.th, the connection will not be authenticated.
Click OK. |
 |
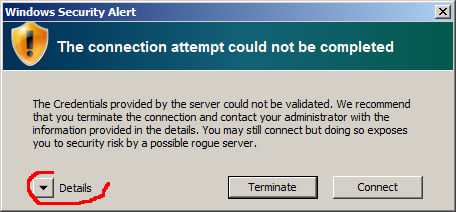
| 7. | When you get the message saying that the Credentials provided by the server could not be validated, click on Details.
This message arises because Windows 7 does not contain the Certificate Root used by Let's Encrypt. |
 |
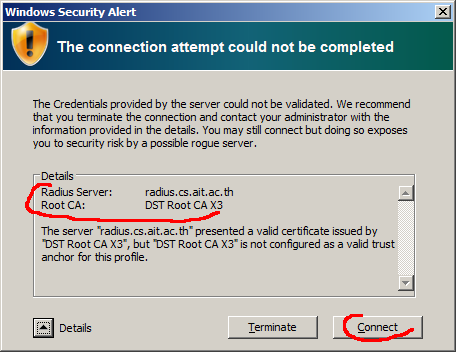
| 8. | Check that the the details are as follow (it is very important that you confirm that the details are correct, else you could be sending your password to an untrusted server):
Radius server: Click Connect. You are now connected to |
 |
Configuring eduroam for Ubuntu
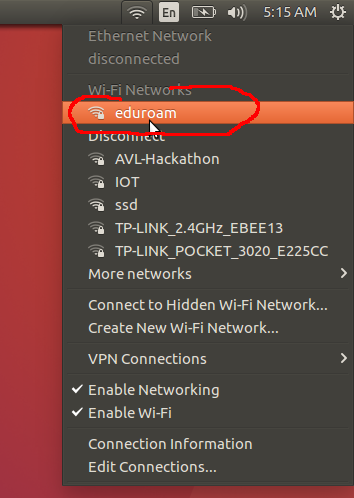
| 1. | Select eduroam from the list of possible wireless networks. |
 |
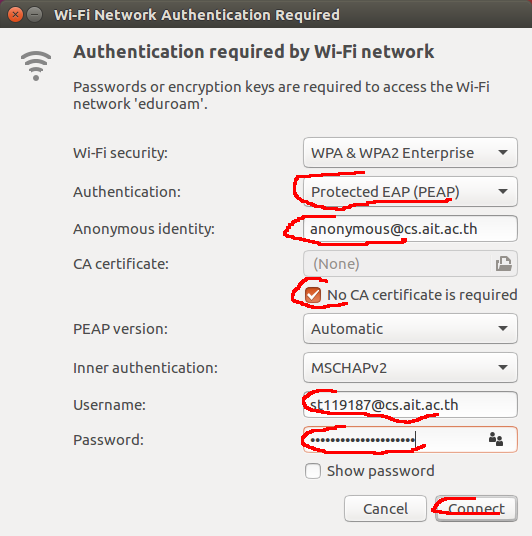
| 2. | In the form for configuring eduroam you must enter the following:- Authentication: Protected EAP (PEAP)- Anonymous identity: - Click on No CA certificate is required. - Username: enter your CSIM username followed by @cs.ait.ac.th. It is important that you do not forget the @cs.ait.ac.th if you want the connection to be authenticated.- Password: use your CSIM password. - Click on Connect. Your connection to eduroam is established. Any time and anywhere the eduroam network is available, you will be automatically connected. |
 |
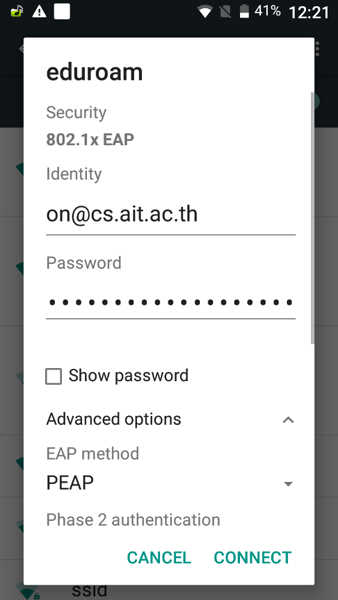
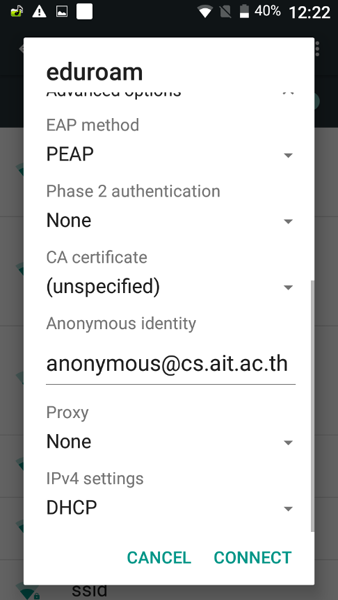
Configuring eduroam for Android
When you select eduroam WiFi connection on your smartphone, you must enter your CSIM username (with @cs.ait.ac.th at the end) and your CSIM password. Do not forget the @cs.ait.ac.th or the connection will not be authenticated.
Note that your password is always sent on encrypted connection, the Anonymous identity protects only your username Click on Advanced options and use The other options need no change. Anytime and anywhere the network |
  |
Configuring eduroam for Mac OS X
This profile may work on iPhones.
| 1. | Download the CSIM eduroam profile on your computer.While you could do the configuration manually, using the existing profile, you are sure all the correct information are provided; this include the anonymous identity as describe in the paragraph about what is anonymous identity below. |
|
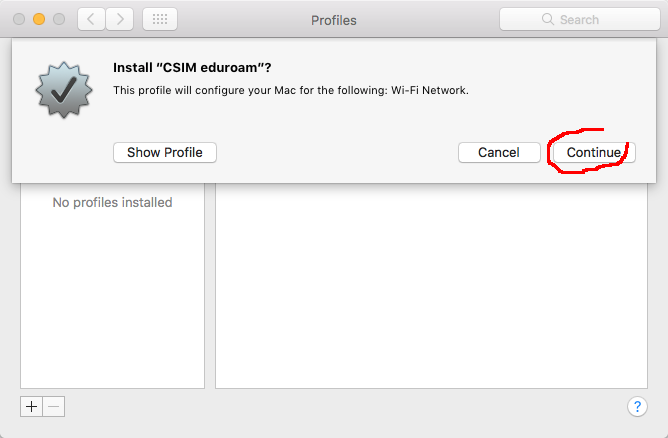
| 2. | Double click on the file you have downloaded, this will start installing CSIM eduroam profile on your computer.Click Continue. |
 |
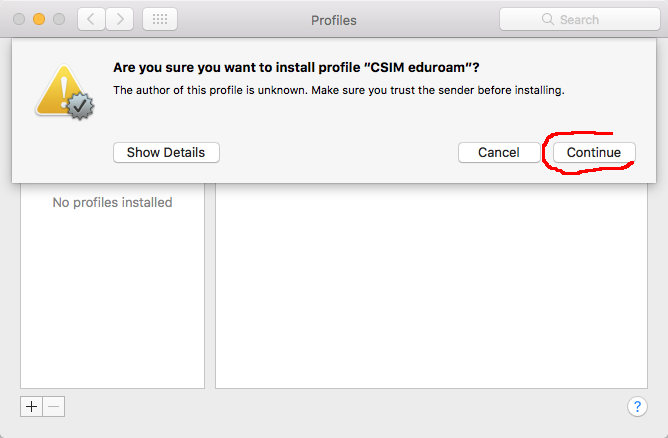
| 3. | The profile has not been signed or certified, but it is valid. Click Continue to trust the profile. |
 |
| 4. | At this stage, you must provide the account and password you will be using with eduroam.Make sure you use @cs.ait.ac.th after your user name; for example st119873@cs.ait.ac.thWithout the @cs.ait.ac.th, authentication to eduroam will fail. Use your CSIM password.If you install this profile on a system with several users, leave the username and password empty; each user will have to enter his credentials when he connects to eduroam. |
 |
| 5. | To save the profile in your computer, you must enter the password of the root user. | 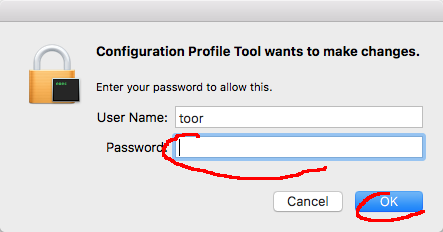 |
| 6. | The profile is installed and look like the example provided. |  |
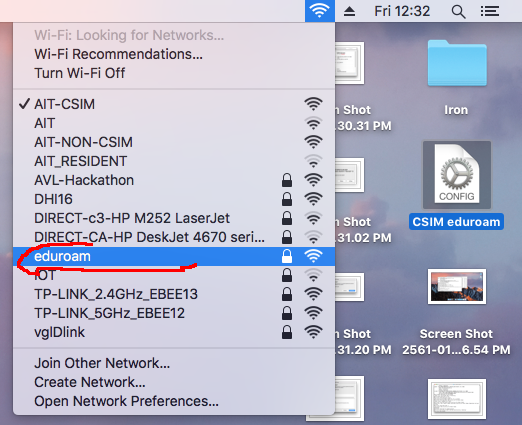
| 7. | Now select eduroam in the list of available WiFi networks. |
 |
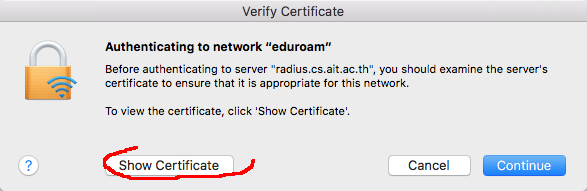
| 8. | The first time you connect to eduroam, your system will need to install the encryption certificate used by our authentication server.Click on Show Certificate to the details of the certificate you are about to install. |
 |
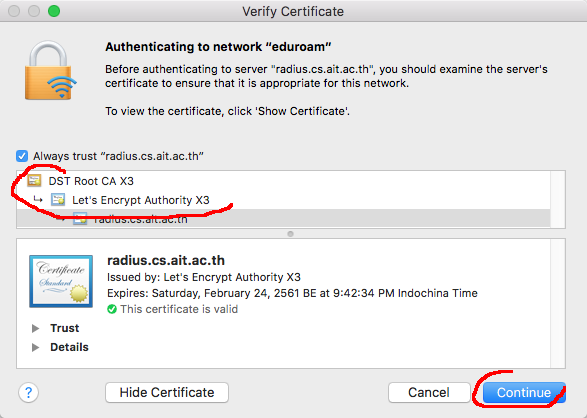
| 9. | It should show: - ISRG Root X1 - Let's Encrypt Certificate - radius.cs.ait.ac.thClick on Continue. |
 |
| 10. | You need to enter the password of your root user to save the certificate. You are now connected to eduroam; any time and any where an eduroam network is available, you will be connected automatically. |
|
802.1x, EAP, eduroam and anonymous identity
When you authenticate with eduroam, your credentials, that is your username and your password, must be sent by your computer to a server at CSIM.
Your password is always encrypted, so it is not a problem.
But your username is not. The system needs to know the part cs.ait.ac.th in order to roam the authentication to CSIM server. If the system can see the cs.ait.ac.th part, it can also see your username. This is not a threat as big as knowing your password, but that could allow phishing, social engineering and open the gate to some attacks. To mitigate this risk, an anonymous identity can be used while negotiating to roaming to CSIM server. Once this roaming is established, an encrypted tunnel is opened and your real username is sent encrypted.
This page describes 802.1x and EAP and how it applies to eduroam in greater details.
| Powered by: |