
You can print on many printers around the campus if you install the special software that works with Ricoh printers.
There are printers available at Admissions, AIT Center reception, AIT IS, EEM room w127, Energy room 204, AIT Extension, HR, ISE, Library, OFAM, Purchasing, SET room n230, TC, WEM room w203, Yunus center, and others.
Not all printers are accessible to everyone, not all printers are accessible 24/7, Library ones are available at the Library opening hours.
Before you use any of the printers, you need to configure the software. Once the printer is configured, it will be working when you are connected in CSIM or anywhere in AIT.
For Linux and MacOS, see at the bottom of this page.
Installing the software on Windows 11(updated 3 Mar 26)
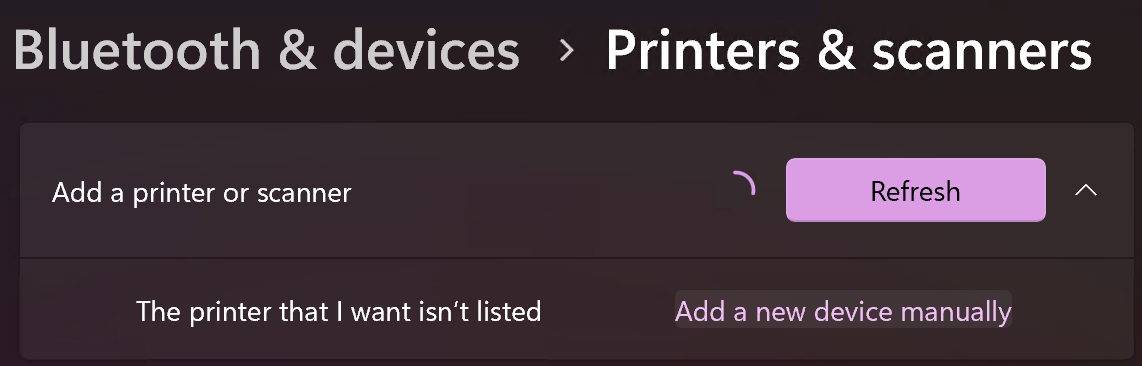
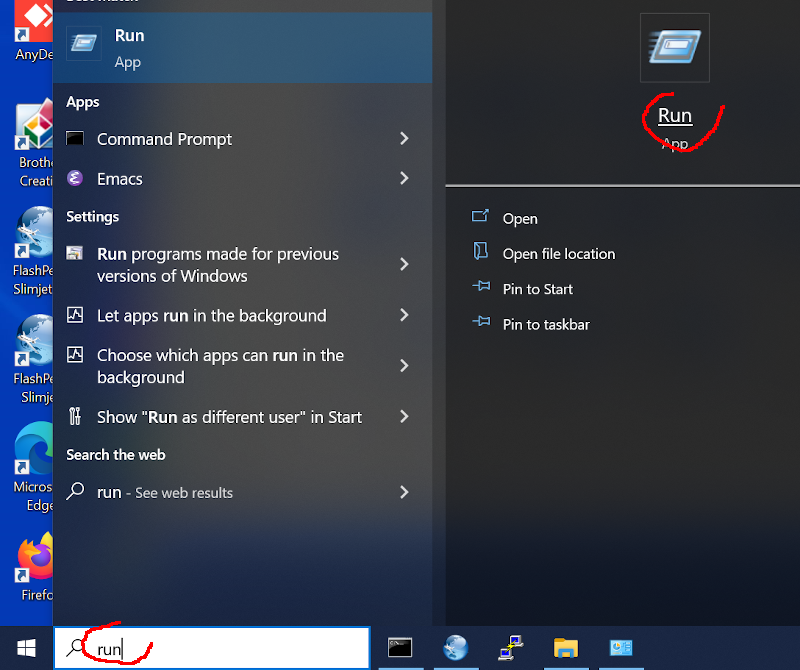
1. Open Printers & Scanners from windows search.
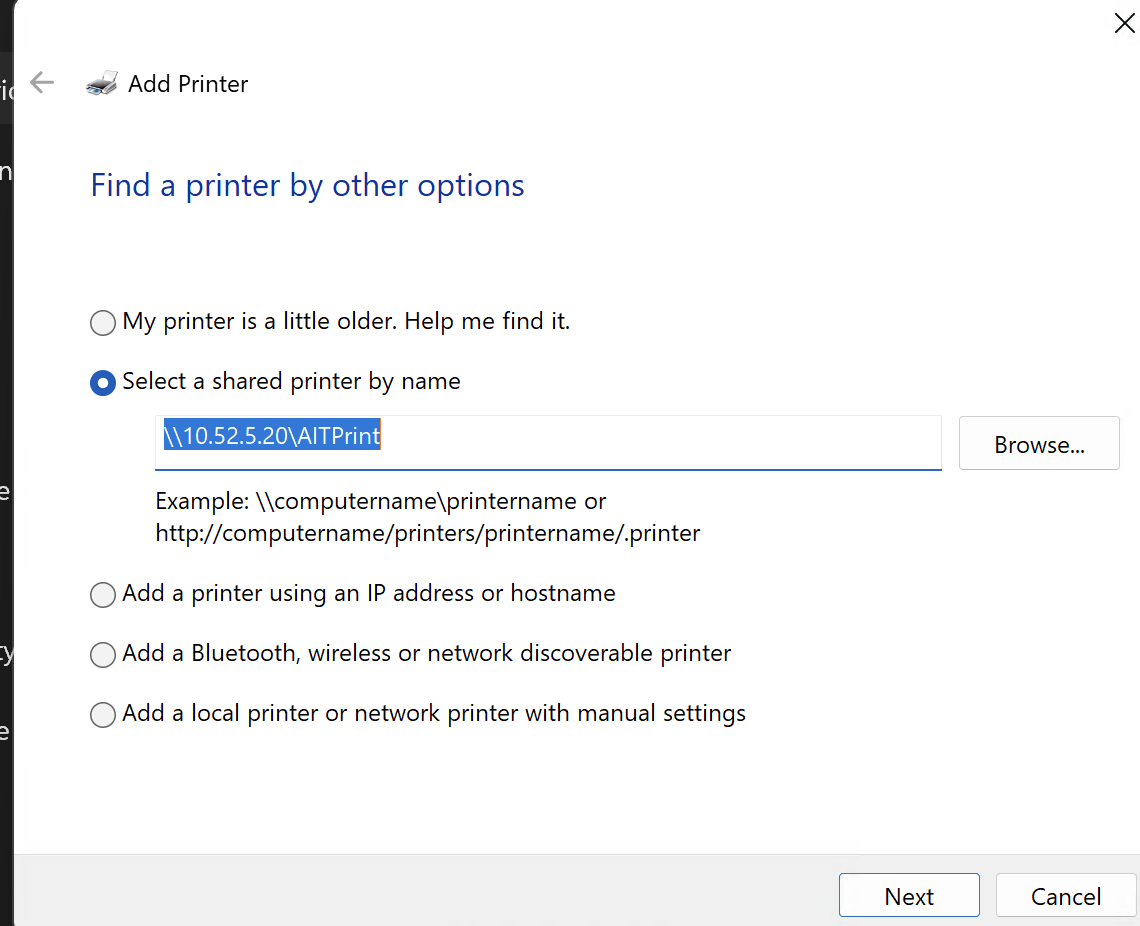
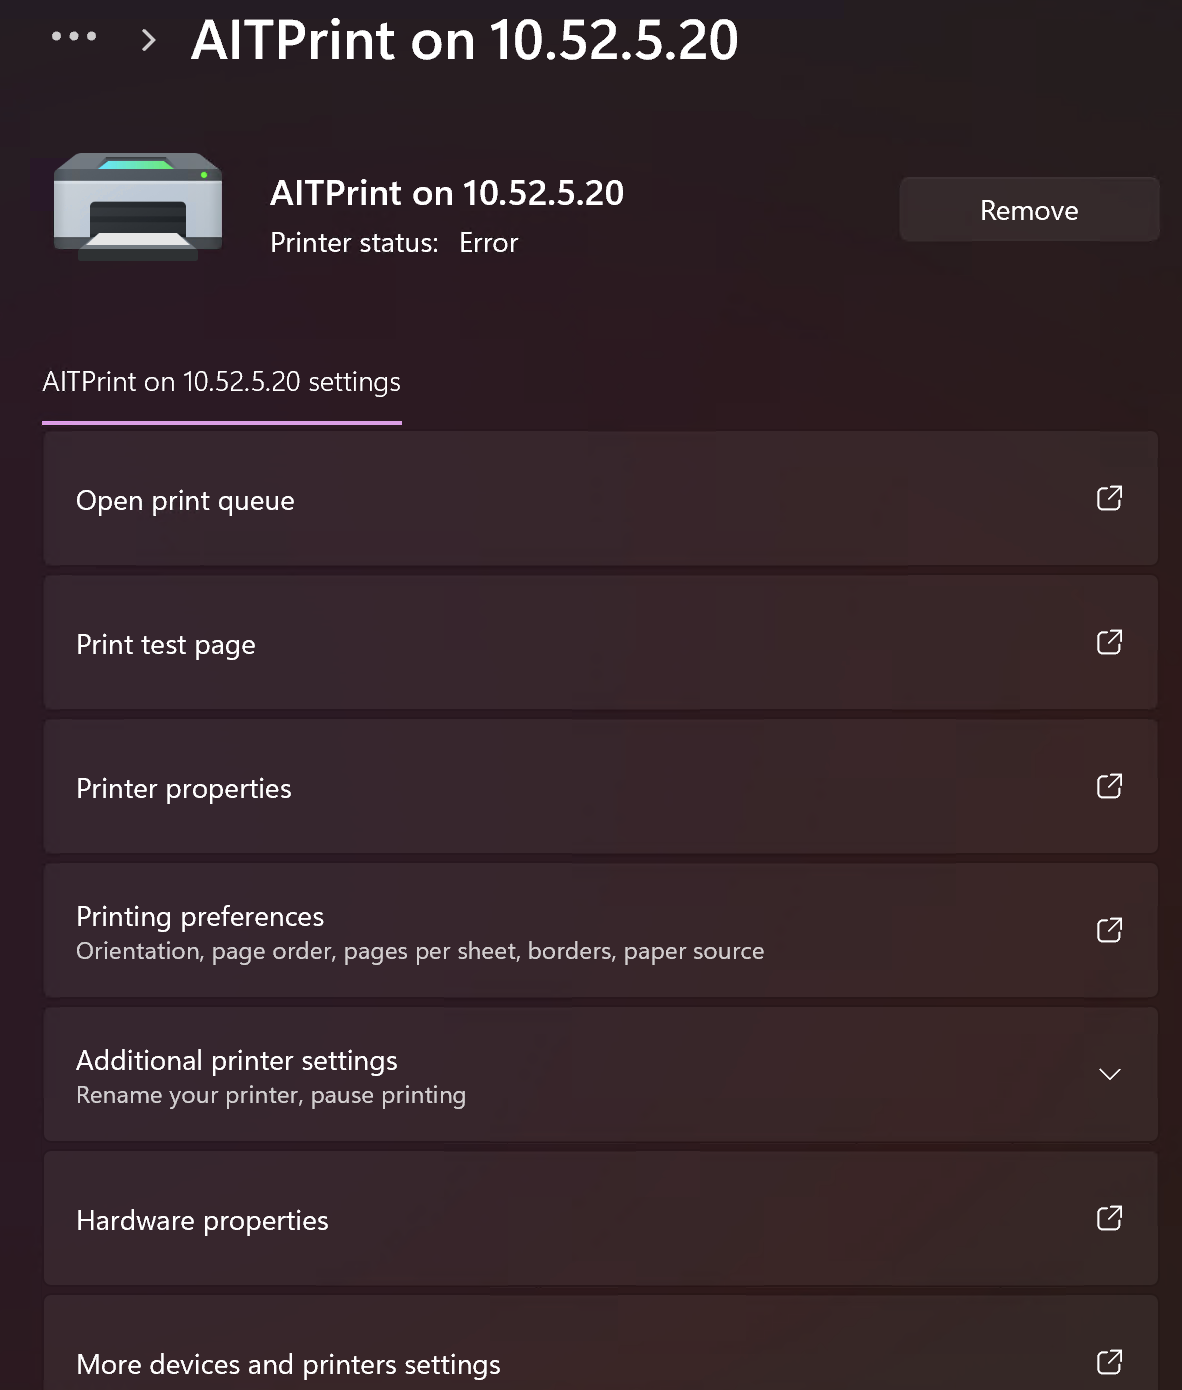
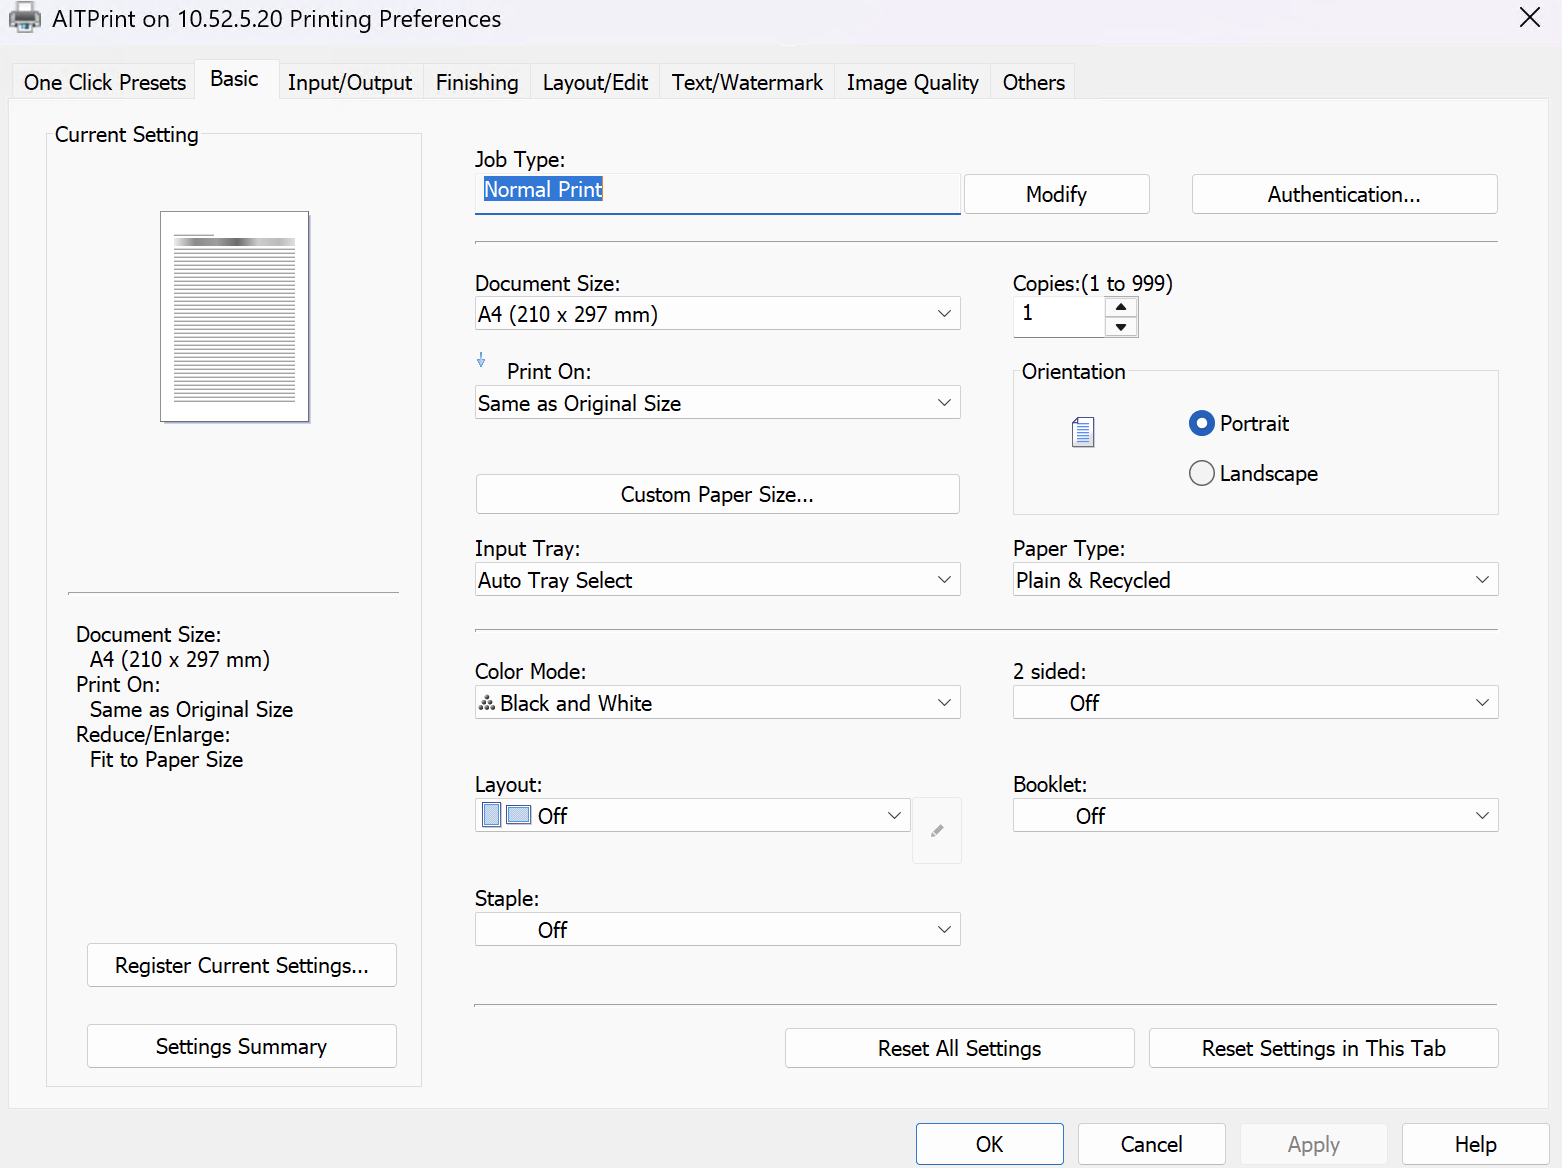
2. Click Add device> wait then Click Add a new device manually > select a shared printer by name > enter : \\10.52.5.20\AITPrint then Next (If it's popup for user&password go for 1234 both user&ps)> wait until successfully >then go AITPrint on 10.52.5.20 Printing preferences... > On Basic tap Click Authentication > enter login User Name: your_account_name

Installing the software on Windows
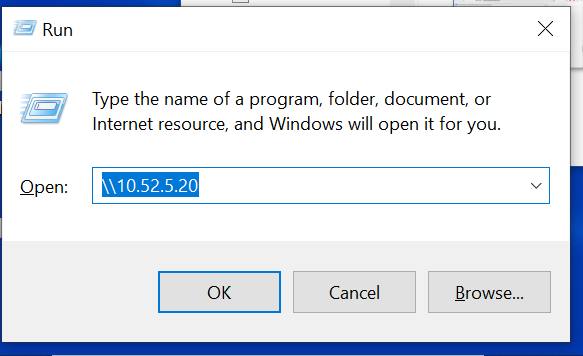
| 1. | Search for Run (or type ⊞ Win+R) to launch a command. |
 |
| 2. | Type \\10.52.5.20 to access the print server. |
 |
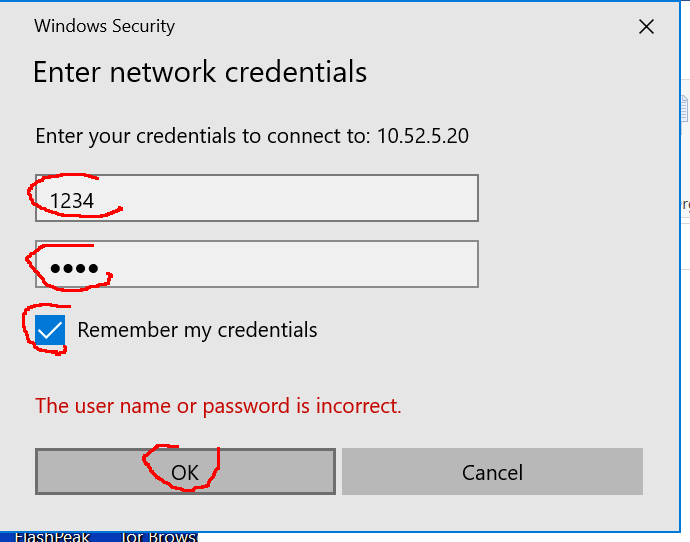
| 3. | Enter the username 1234 and the password 1234.Select Remember my credentialsAnd click OK.Note: the username and password are the four digits 1234, not your own username or password. |
 |
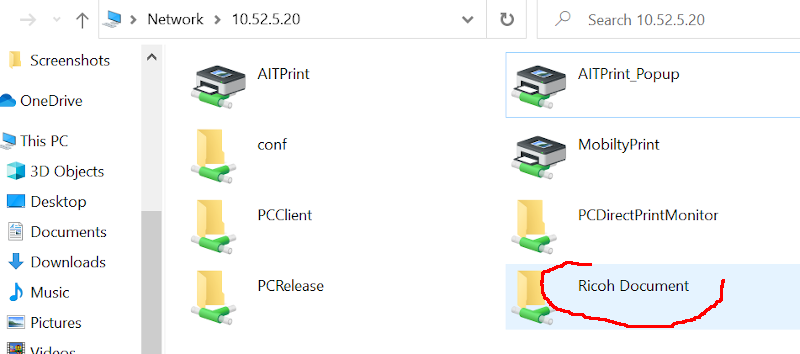
| 4. | Double click on the folder Ricoh Document. |
 |
| 5. | Double click on MapPrinter student popup to launch the installer. |
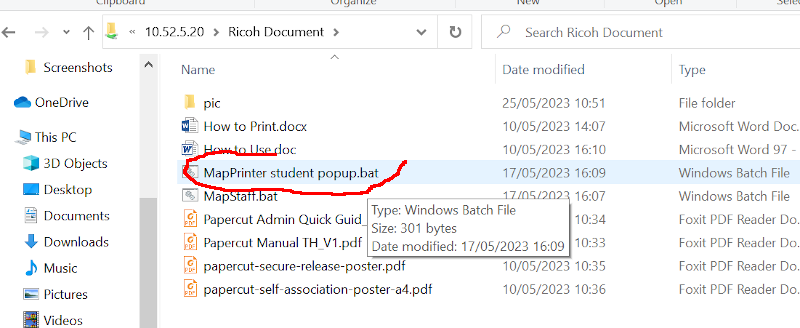 |
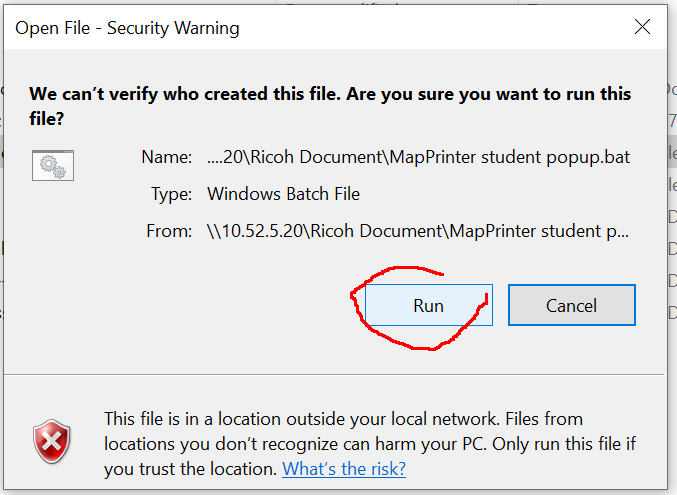
| 6. | Click on Run to accept the installation of the software. A new printer will be added to your computer. |
 |
| 7. | Configure the new printer AITPrint_Popup on 10.52.5.20Right click on the printer and select Printing preferences |
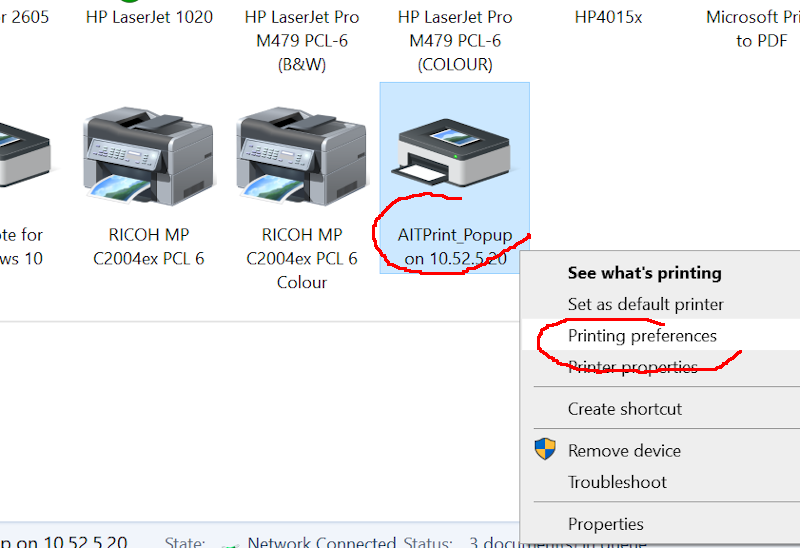 |
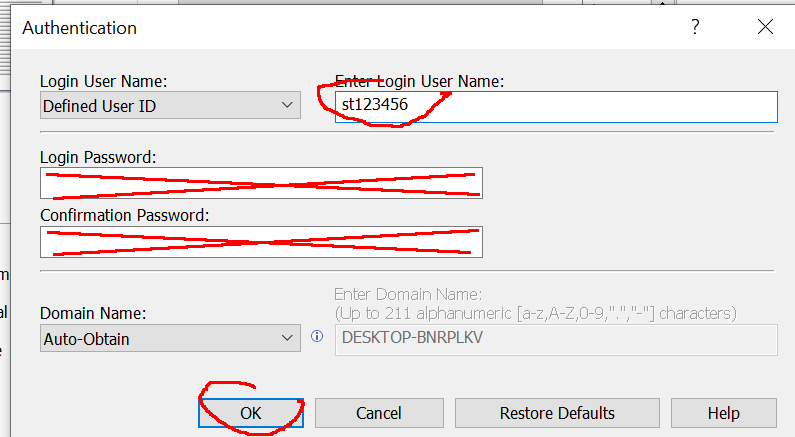
| 8. | Click on Authentication... | 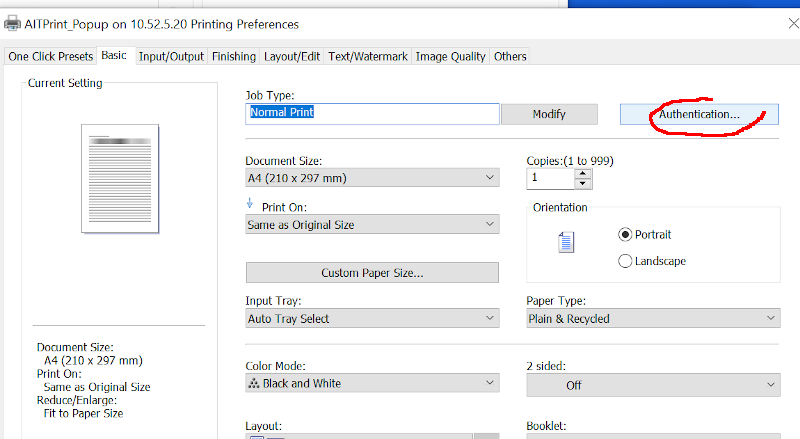 |
| 9. | Type you AIT account name in Enter Login User Name:For students it will be something like st123456.Do not enter your password. Click OK and close all the windows. |
 |
Printing
Use the printer AITPrint_Popup on 10.52.5.20 like any other printer on Windows.
Each time you print a document, the Authentication popup will show, like on point 9, above, just click OK.
You print job has been queued and now you can go to a printer to do the physical printing.
Using your AIT ID card
The first time you print a document, you can register your AIT ID card with the system. Once your card is registered, you will only have to wave your card at one of the printer to collect your documents.
Note: Only use your personal, actual AIT ID card, do not use the card of a friend, do not use the card from last year, do not use the card of your condo or your ATM card. The system does not check the card, but it will in the future.
If you are issued a new card, swipe it on a printer and proceed to associate it to your account. You can only have one card associated to your name at any given time.
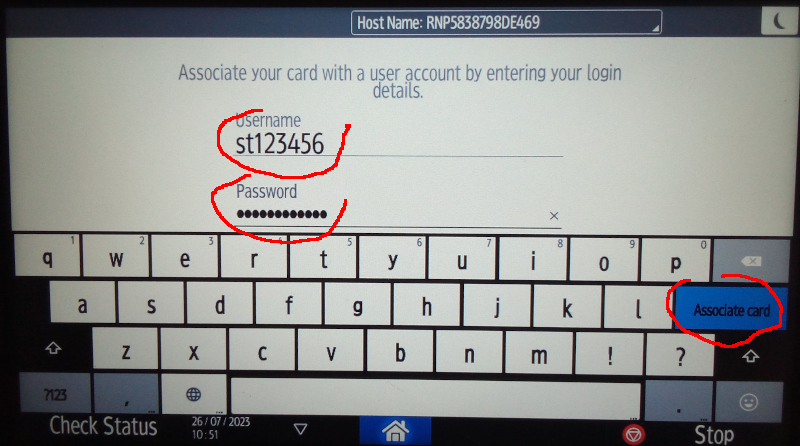
| 1. | Insert your AIT ID card in the card reader of one printer. The card reader is located on the right, under the control panel of the printer. |
 |
| 2. | If the system has never seen that card before, you must authenticate. to associate the card to your name. Use your AIT username st123456 and AIT password.Click on Associate card.Your card is saved in the system. |
 |
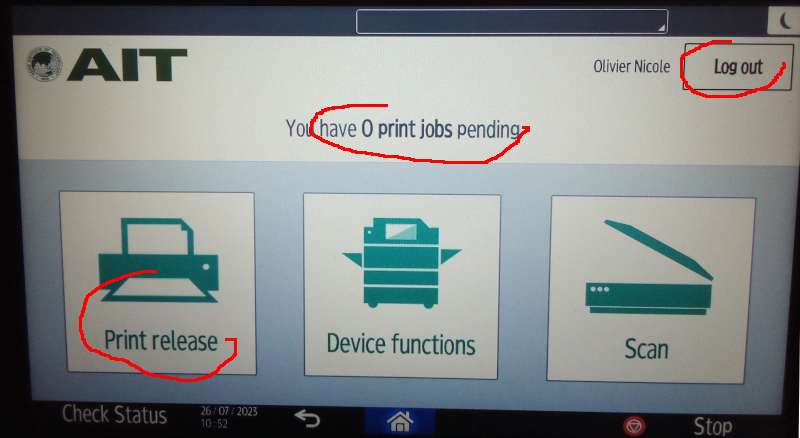
| 3. | The system display the list of pending jobs. Click on Print release.Do not forget to Log out when you are done printing. |
 |
| 4. | Next time you need to print, just swipe your card on any printer and you will be redirected to step 3. automatically. |
Installing the printer for Linux
It should also work for any other flavour of Unix.
To use the printers disseminated in AIT, you need to add a new printer to your computer, with the following settings:
Network printerLPD/LPR Host or PrinterHostst123456@10.52.5.20- Note: It is very important that you use your AIT username in front of the host IP address. On your laptop, you have a username that is not your AIT student ID, maybe you use your first name or your nick name... This name is unknown in AIT systems, so you must indicate that you will be printing using that specific AIT username.
- Anyone printing with your laptop will be using your account and your quota.
QueueAITPrint- Be careful to use the proper upper and lower cases.
MakesRicohModelIM C2000DriverRicoh IM C2000 PS [en](recommended)
Note: do not print a test page, on Linux it prints a two sided colour page, that will count for 20 pages on your quota.
Using your AIT ID card to release the print jobs is the same as for Windows users above
Installing the printer for MacOS
- Method: Open Print Center > Choose Printer > Add Printer.
- The Secret: In the Add Printer window, hold down the Option key and click the Default icon, or right-click in the toolbar and select Customize Toolbar to add the Advanced (Gear icon) button.
- Options: This allows setting up manual IP printing, choosing specific protocols (LPD, HP Jetdirect, IPP), and selecting specific driver models.
2. open +(add printer) go advanced tap > select Type: LPD > enter > lpd://

Note: do not print a test page, on Linux it prints a two sided colour page, that will count for 20 pages on your quota.
Using your AIT ID card to release the print jobs is the same as for Windows users above