Accessing MySQL with HeidiSQL
HeidiSQL (formerly MySQL Front) is a free tool to work with databases such as MySQL, MariaDB, PostgreSQL, SQLite and Microsoft SQL. It is a powerful and versatile tool for you to work on your database. It can be installed on MS Windows, Linux and any plateform that support Wine (the MS Windows emulator).
Another advantage is that HeidiSQL supports what is needed for authentication at CSIM (SSL encryption and mysql-cleartext-password); it also includes an SSH tunnel that allows to work even if you are outside of CSIM.
HeidiSQL has been developped for Windows, to install it on your Windows system, simply download it from the web site. Note that you can choose the portable version that would work from a USB drive and would not need to b installed on a computer.
For Ubuntu, the installation is done with snap:
sudo apt-get update
sudo apt-get install snapd
sudo snap install heidisql-wine --beta
The interface for Windows and for Ubuntu are very similar.
Care should be taken when configuring HeidiSQl to work for CSIM.
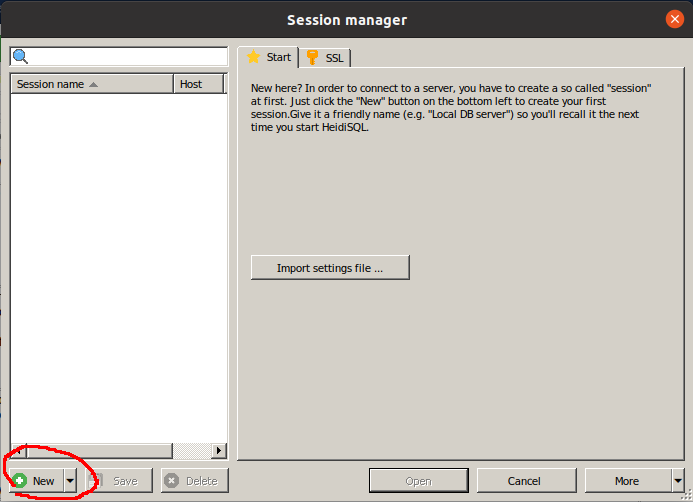
| 1. | Start HeidiSQL. Click New to create connection to CSIM MySQL server. |
 |
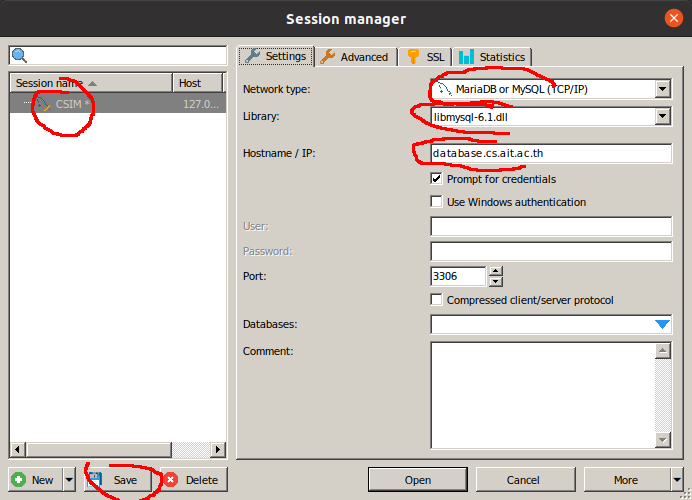
| 2. | Give a name to that connection. Select MariaDB or MySQL (TCP/IP). This connection only work inside CSIM. If you plan to work outside of CSIM see the step 3 bellow.Select the library libmysql-6.1.dllEnter the hostname database.cs.ait.ac.thClick on SaveYou may choose to enter your credentials and save them too. |
 |
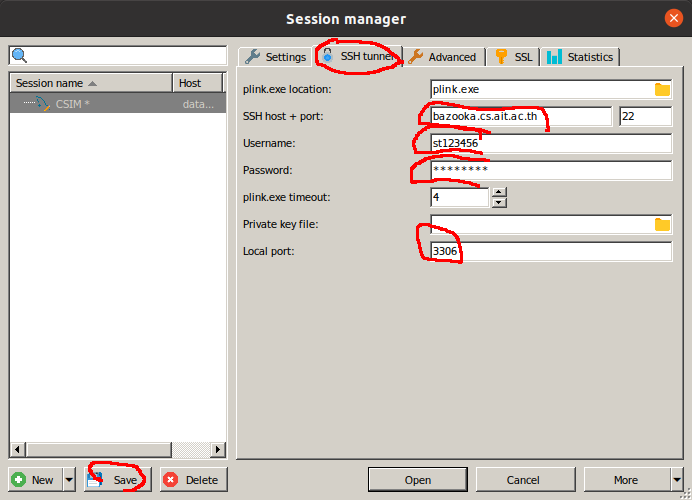
| 3. | Only if you plan to use HeidiSQL outside of CSIM. Select MariaDB or MySQL (SSH tunnel)A new index is create with the title SSH tunnelIn this index enter the following informations: SSH host: bazooka.cs.ait.ac.thUsername and Password are your own credential for CSIM Local port: 3306Click SaveNote: you could use SSH tunnel while you are inside CSIM,but it would make the system slower. |
 |
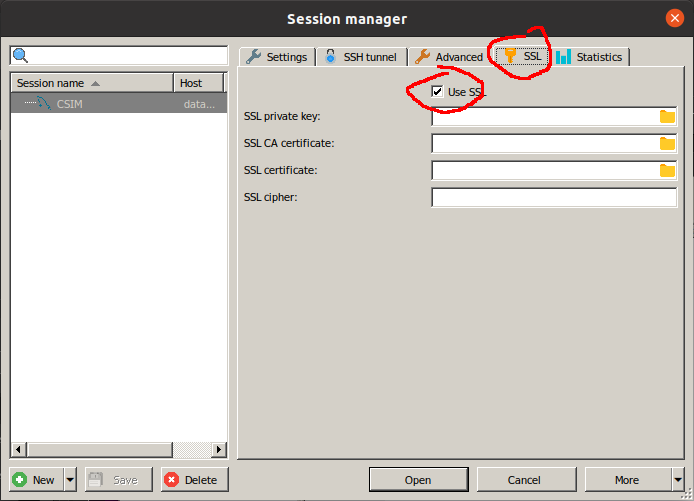
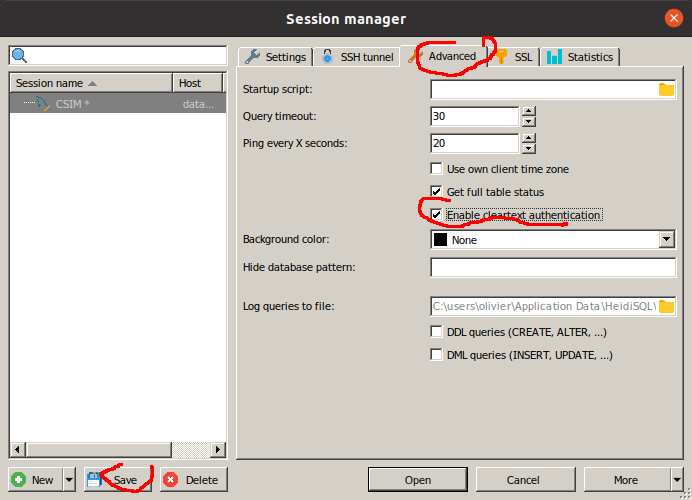
| 4. | Configure the SSL authentication with MySQL server Go to the index SSL And check the box Use SSLNote, on Ubuntu, this is in the index Advanced. Click Save |
 |
| 5. | Configure the clear text password needed by LDAP authentication Go to the index Advanced And check the box Enable cleartext authenticationClick Save |
 |
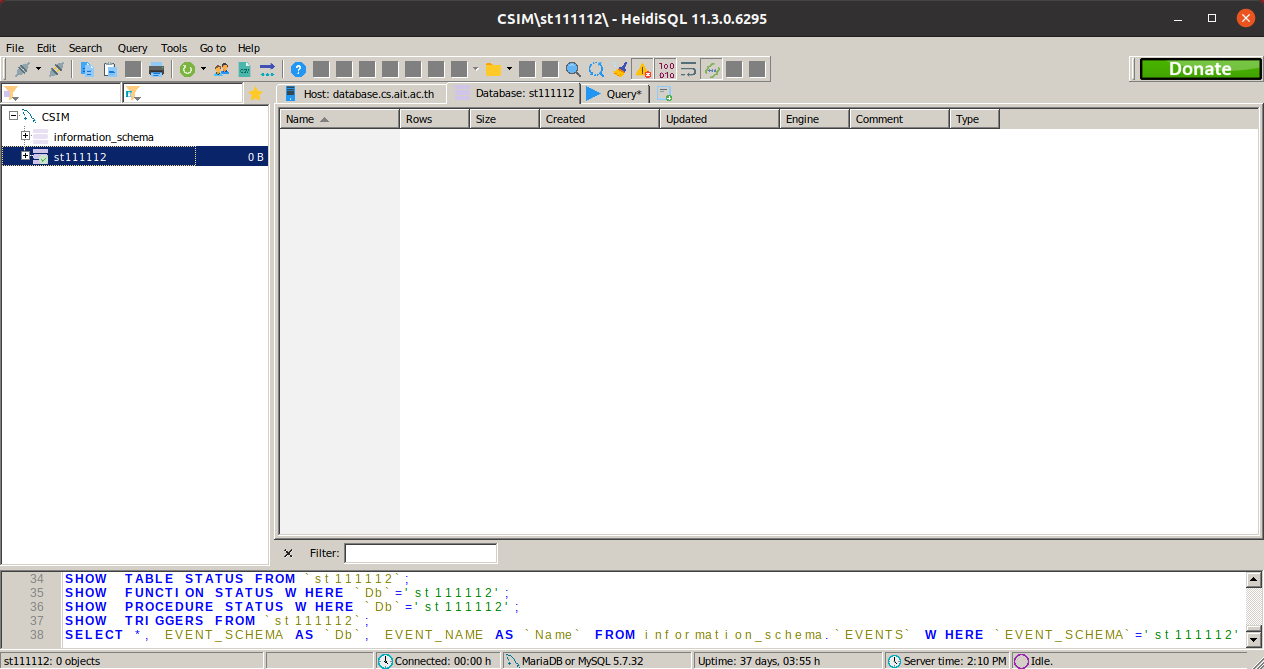
| 6. | You are ready to connect to your database. The first time you connect, you will see a message about accepting the certificate for SSH, click on accept anyway.On Ubuntu you will also see another message about keyboard interactive authentication, you can ignore it. Once you get the main working window, you can see a database under your name where you can start creating tables. |
 |
| Powered by: |
|